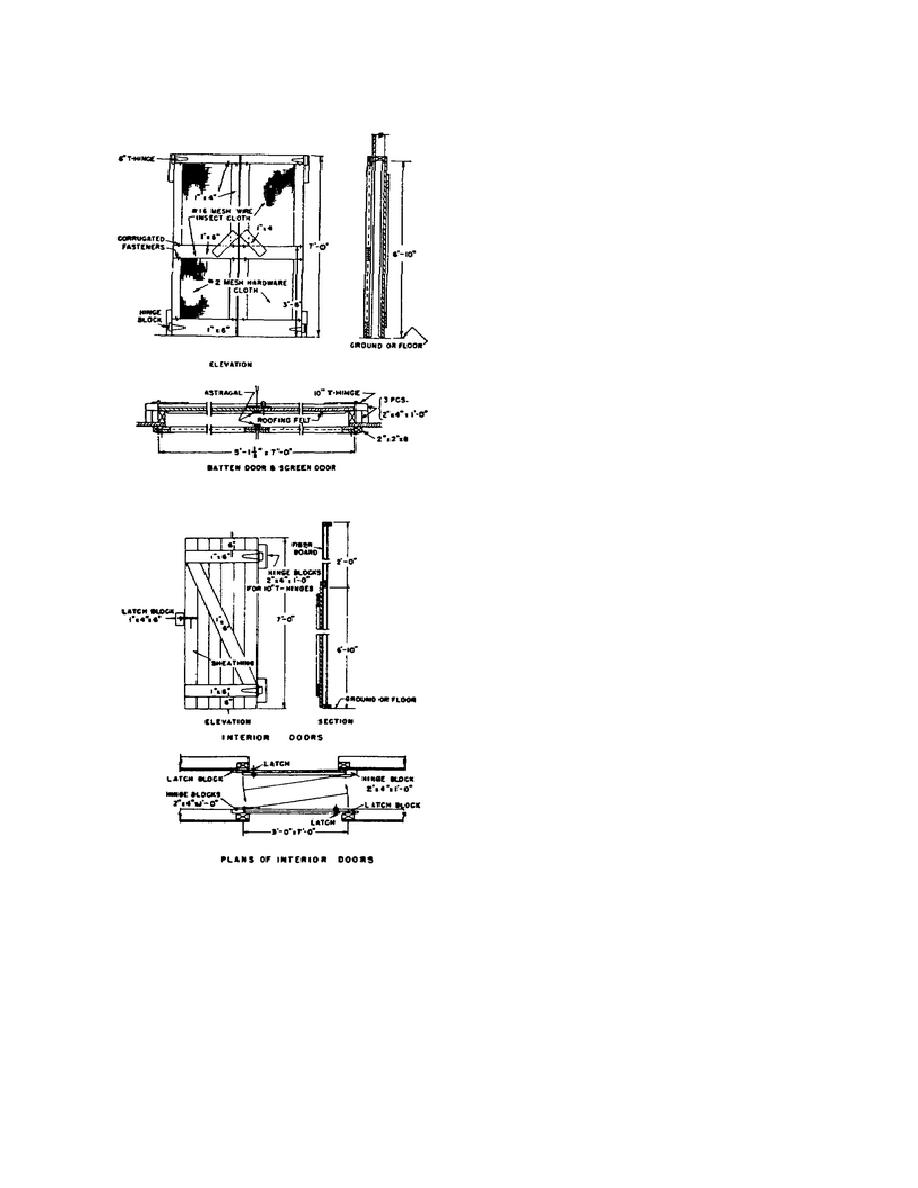
single inside door. Both the outside and inside door
frames may be modified to suit climatic conditions.
In TO construction, the
d. Doors.
carpenter who erects the building usually makes the
doors from several boards with battens and braces as
shown in figure 3-7. These boards are 1 x 6's, laid
close together and ailed to battens. The battens are
placed with their edges 6 inches from the ends of the
door boards. A brace is placed between the battens,
beginning at the top batten end opposite the hinge
side of the door, and running to the lower batten
diagonally across the door. These battens and braces
are well nailed. If the door is used as an outside
door, roofing felt is used to cover the boards on the
weather side. The battens and braces are nailed over
the felt. Wooden laths are nailed around the edges,
top, bottom, and sides, and across the middle of the
door to hold the roofing felt in place. The battens
and braces on doors are of 1 x 6's and are nailed
securely to the door boards. In hanging these doors,
T-strap hinges are used. The hinges are fastened to
Figure 3-8. Double outside door.
the battens of the door and to the hinge blocks on the
door casing or post. One-quarter of an inch clearance
should be left at top, bottom, and latch side of the
door to take care of expansion.
e. Window frames. In TO construction,
millwork frames are seldom used. The window
frames are mere openings left in the walls with the
stops all nailed to the stud. The sash may be hinged
to the inside or the outside of the wall, or constructed
so as to slide. The latter type of frame is the most
common in Army construction as it requires little
time to install. Figure 3-10 shows the section and
plan of a window and window frame of the type used
in the field. After the outside walls have been
finished, a 1 x 3 is nailed on top of the girt at the
bottom of the window opening to form a sill. A 1 x 2
is nailed to the bottom of the plate on the side studs
and acts as a stop for the window sash. A guide is
nailed at the bottom of the opening flush with the
bottom of the girt, and one nailed to the plate with the
top edge flush with the top of the plate. These guides
are 1 x 3's, 8 feet long. Stops are nailed to the bottom
Figure 3-9. Single inside door.
girt and plate between the next two studs, to hold the
sash in position when open.
finish, where the hinges are to be placed to provide a
nailing surface for the hinge flush with the door.
Figure 3-9 shows the elevation, section and plan of a
3-7


 Previous Page
