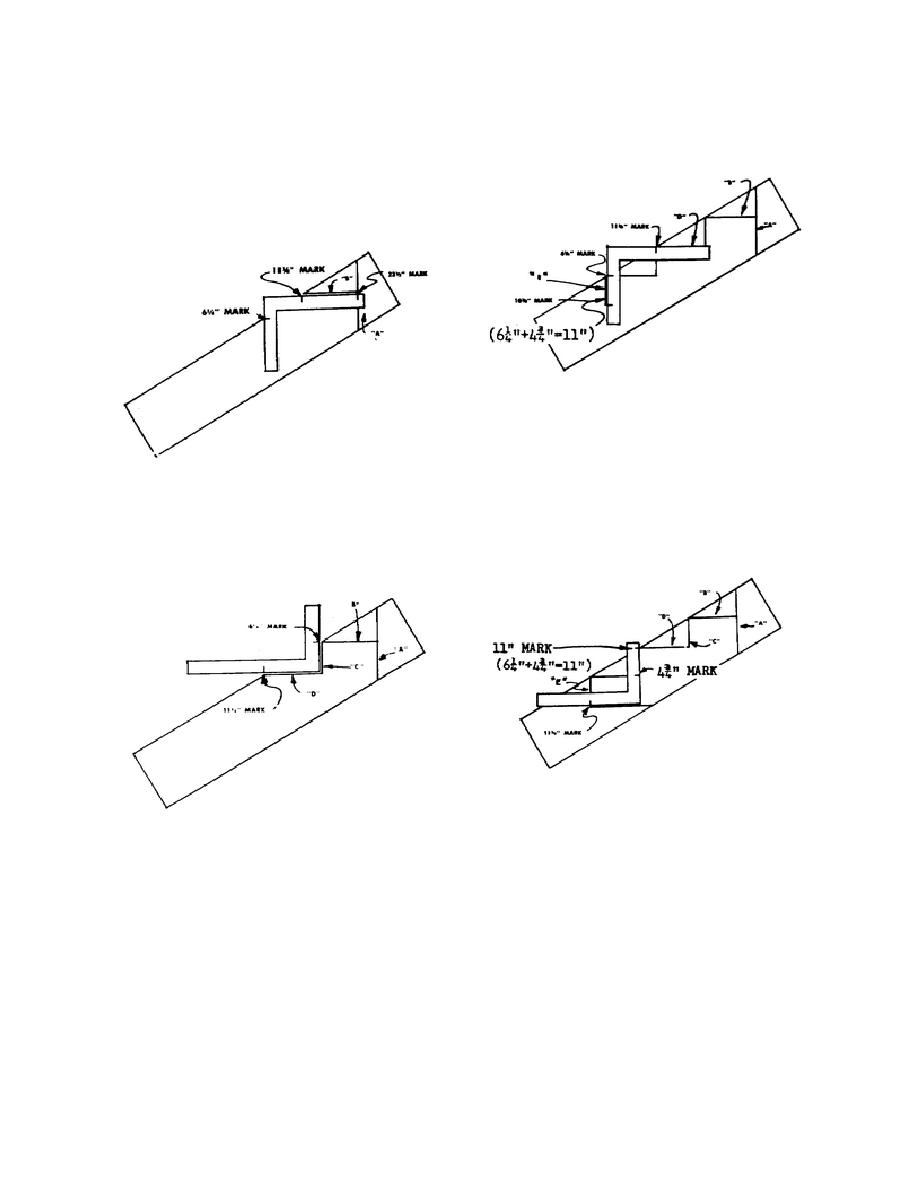
vertical cut that will be framed against the platform.
by the thickness of a tread - in this case 1 1/2
inches.
(2) The next step is to mark off the top
tread. Using again a rise of 6 1/4 inches but with a
run of 2 times 11 3/4 or 23 1/2 inches, lay off the top
tread as shown in figure 3-16. By drawing line B 11
3/4 inches long, the top tread has been marked.
Figure 3-18. Layout of bottom riser.
(5) The final step is to mark the
horizontal cut at the lower end of the stringer. It is
located by drawing a horizontal line through the
lower end of line E. Figure 3-19 shows the
Figure 3-16. First tread cut.
placement of the framing square. When this line has
(3) To mark the top riser of the stringer
been drawn, the layout of the stair stringer is
and the second tread from the top, use again a 6 1/4-
complete. The stringer can then be cut out and used
inch rise and 11 3/4-inch run and mark them in the
as a pattern for other stringers of the same stairs,
manner shown in figure 3-17. Line C is the riser and
either conventional or built-up.
D the tread.
Figure 3-19. Marking the bottom horizontal cut.
c. The triangular blocks cut out in cutting
Figure 3-17. Riser and tread layout.
conventional stringers from 2 x 12 or similar stock
can be used to make built-up stringers. The blocks
(4) The next tread and riser are marked
are toenailed to a piece of 2 x 4 stock as shown in
in exactly the same way as C and D. When this is
figure 3-20. The vertical cut (fig. 3-15) and the
completed, the only marks still to be laid off are the
bottom cut (fig. 3-19) are obtained by using an
bottom riser and the horizontal cut at the bottom of
already cut conventional stringer as a pattern, adding
the stringer. Figure 3-18 illustrates how the bottom
pairs of scabs if necessary to fill out the
riser is marked. It should be noted again that the
bottom riser is always shorter than the other risers
3-11


 Previous Page
