through the use of heavier joists rather than by closer
securely nailed and the joist should not be notched
spacing. However, in some instances, such as under
over one-third of its depth. 4, figure 1-30 shows the
a safe, it may be desirable to place the joists closer
result of notching too deeply. There are several other
together. Two-inch material should not be used for
methods, but those mentioned above are more or less
joists more than 12 inches in depth.
standard. In the theater of operations it is up to the
officer in charge of the carpenters to determine the
1-32. METHOD OF CONNECTING JOISTS TO
method to be used; he must keep in mind that time,
SILLS AND GIRDERS
labor, and material are of vital importance.
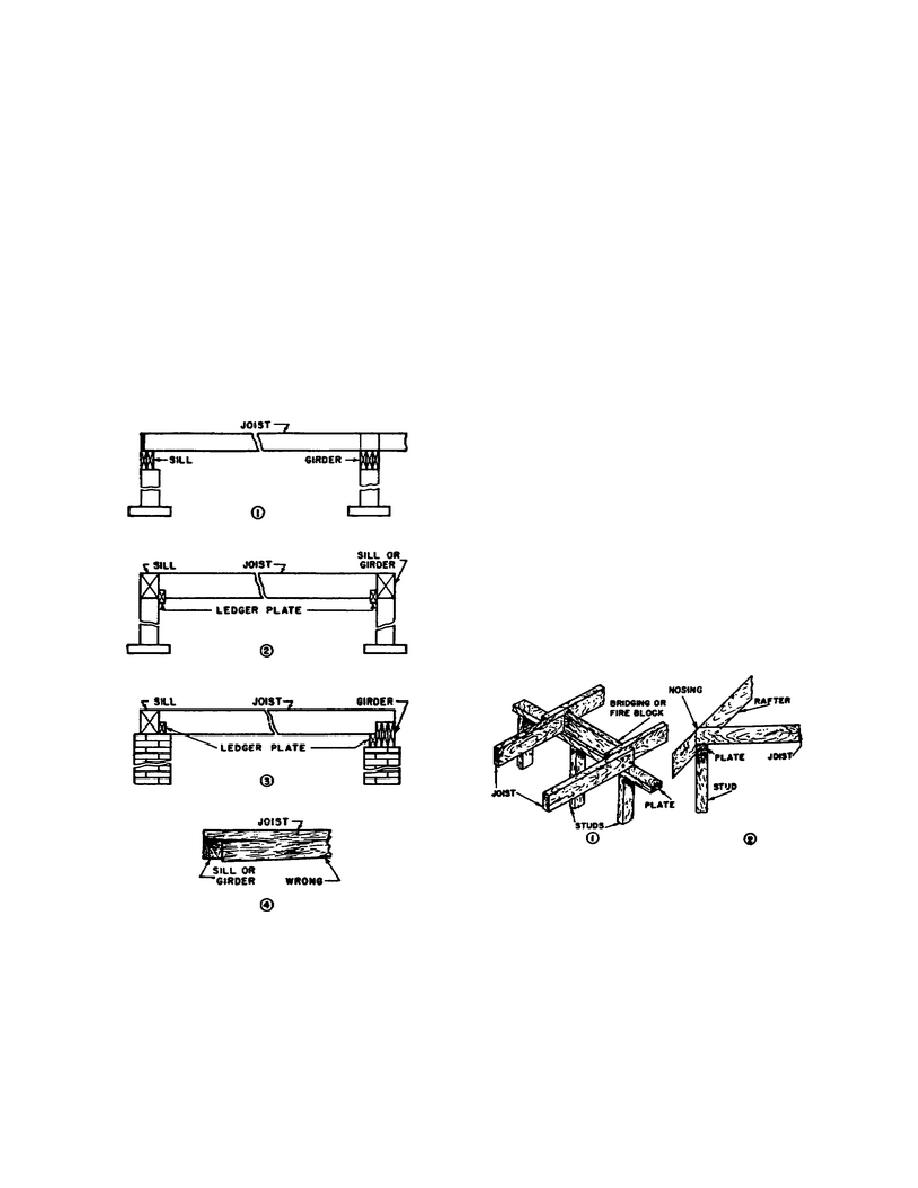
a. Connecting to sills. In joining joists to
sills, always be sure that the connection is able to
the joists to the girders may be accomplished in
hold the load that the joists will carry. 1, figure 1-30
several ways, depending upon the position of the
shows the joists resting upon the sill. This method is
girder. The placing of the girders is an important
the most commonly used because it gives the
factor. The joists must be level; therefore, if the
strongest possible joint. The methods shown in 2, 3,
girder is not the same height as the sill, the joist must
figure 1-30 are used where it is not desirable to use
be notched as shown in 3, figure 1-30. If the girder
joists on top of the sill. The ledger plate should be
and sill are of the same Height, the joist still must be
connected to the sill and girder to keep the joist level.
Joists are connected to girders as shown in figure 1-
30. In placing joists, always have the crown up since
this helps counteract the weight on the joist.
Overhead joists are joined to plates as shown in 1,
figure 1-31. The inner end of the joist rests on the
plate of a bearing partition. When a joist is to rest on
plates or girders, either the joist is cut long enough to
extend the full width of the plate or girder, or it is cut
so as to meet another joist in the center of the girder
and connected with a scab (fig. 1-7). Where two joist
ends lie side by side on a plate or girder, they should
be nailed together (1, figure 1-31). In 2, figure 1-31
the end of the joist rests on a wall plate.
Figure 1-31. Joist connections to plate.
Figure 1-30. Sill and joist connections.
1-34


 Previous Page
