b. Care and Use of Cutting Tools. Cutting tools, like boring
tools, have sharp edges and points, which need to be sharpened and
protected. The term sharpen is used here in a broad sense to include
all of the operations required to put a saw in firstclass condition.
The master carpenter is an expert in using the right tool in the
right way.
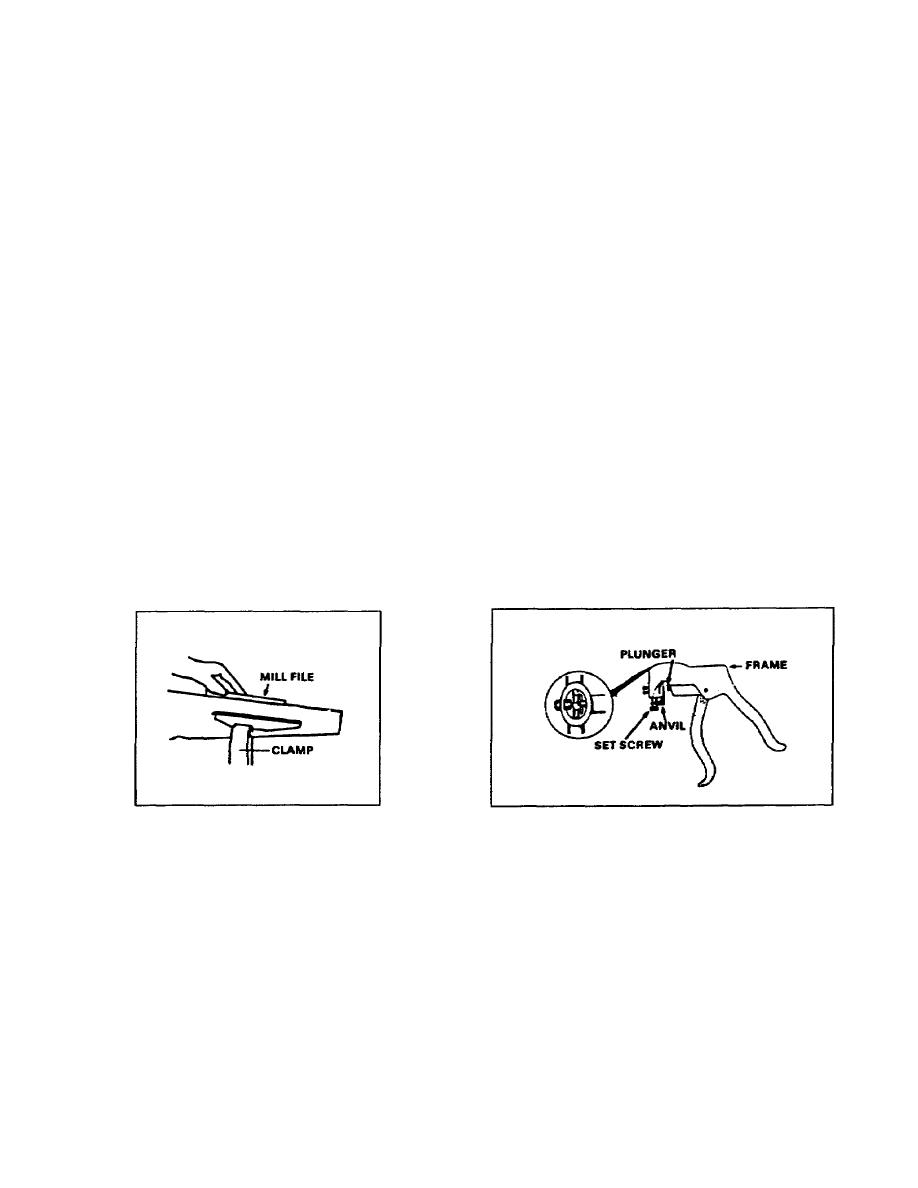
(1) Jointing. When a saw comes from the factory, the teeth are
all uniform in size, length, bevel, pitch, and set. After being used
and sharpened a few times, the teeth become distorted. When this
occurs, they must be filed to a straight line. This operation is
called jointing (Figure 212). When you joint a saw, place it in a
saw vise with the handle to the left. Starting with the heel end of
the saw, lay a flat file on top of the teeth and move it lightly
along the top of the teeth. Do not top the file. Continue this
operation until all teeth are even, with a slight crown at the top of
each tooth. If you find that the teeth are too short, which would
make them hard to set, file them to the proper shape before they are
set.
(2) Setting. After the teeth are made even by jointing, they
must be set. This means that every tooth will be bent a little to
give the blade sufficient clearance. For a handsaw, the set should
be half the thickness of the blade. This rule applies to both
crosscut saws and ripsaws. When using a saw set (Figure 213), bend
every other tooth (halfway from the point), starting at either end of
the saw. Do not attempt to hurry this operation; it takes skill and
practice to do it properly.
Figure 2-13.
Saw set
Figure 2-12.
Jointing a saw
(3) Filing. To file a crosscut saw (Figure 214, page 28),
place the saw securely in a saw vise with the handle to the left.
Using a threecornered file, start filing from the heel end. Place
the file between two teeth and incline it toward the small or tapered
end of the saw. File both teeth at once, using one or more strokes
and putting the same pressure on each stroke. Work down the length
of the saw, then turn the saw around so that the handle is to the
right. Incline the file to the tapered end, which is now to the
left, and again work down the length of the saw.
2-7
EN5155


 Previous Page
