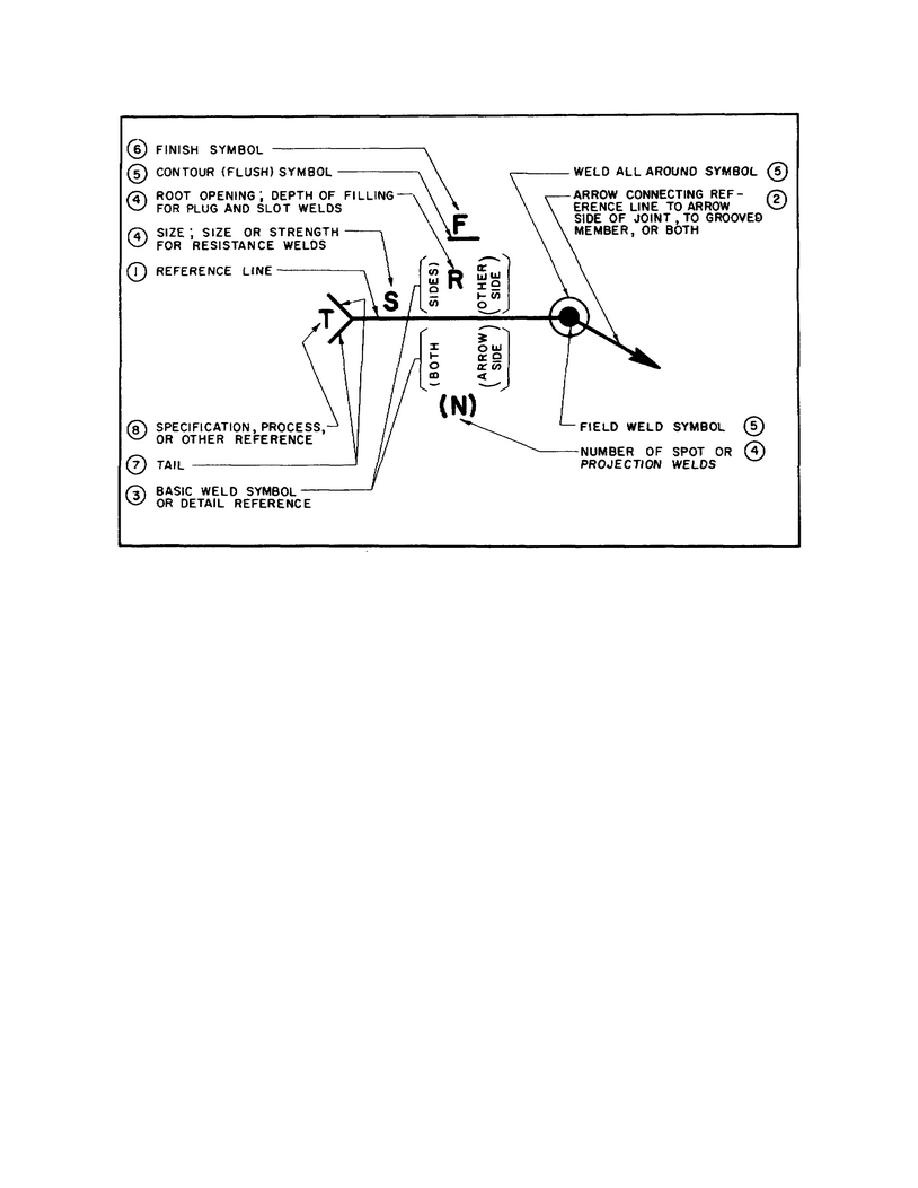
Figure 2-35. Standard location of elements of a welding symbol.
and contour of weld is to be flush, respectively.
symbol designates arrow side, other side, or both
sides to be welded.
(6) Finish. The finish symbols indicate the
method of finishing (C = chipping, M = matching, G
2-20. STRUCTURAL DRAWINGS
= grinding, R = rolling, H = hammering) and not the
degree of finish.
Structural drawings usually consist of some or
all of the elements described in the following
(7) Tail. The tail is only used to set off the
paragraphs.
notation that designates a definite process or
specification or other references considered as
a. Shop Drawings. Shop drawings show the
element (8) of the welding symbol. When no
details of the fabrication of parts and methods of
notation is required, the tail may be omitted from the
assembly of the structural members that are prepared
welding symbol.
in special fabricating shops. Figure 2-37 illustrates
structural members (a beam and a column) fabricated
from a combination of rolled steel shapes. Figure 2-
(8) Specification, process, or other
references. This is a notation that indicates a
38 illustrates structural members of a welded steel
definite process or certain specifications or other
truss.
references. When the use of a definite process is
required, the process may be indicated by one or
(1) Working lines and working points.
more of the letter designations listed in tables 2-7 and
Shop drawings are made about light working lines
2-8.
laid out first along the centerlines of rivet gage lines
to form a skeleton of the assembled member. The
intersections of these working lines are called
d. Applications of Welding Symbols.
Applications of the welding symbol are shown in
working points
figure 2-36. Note how the location of the weld
81


 Previous Page
