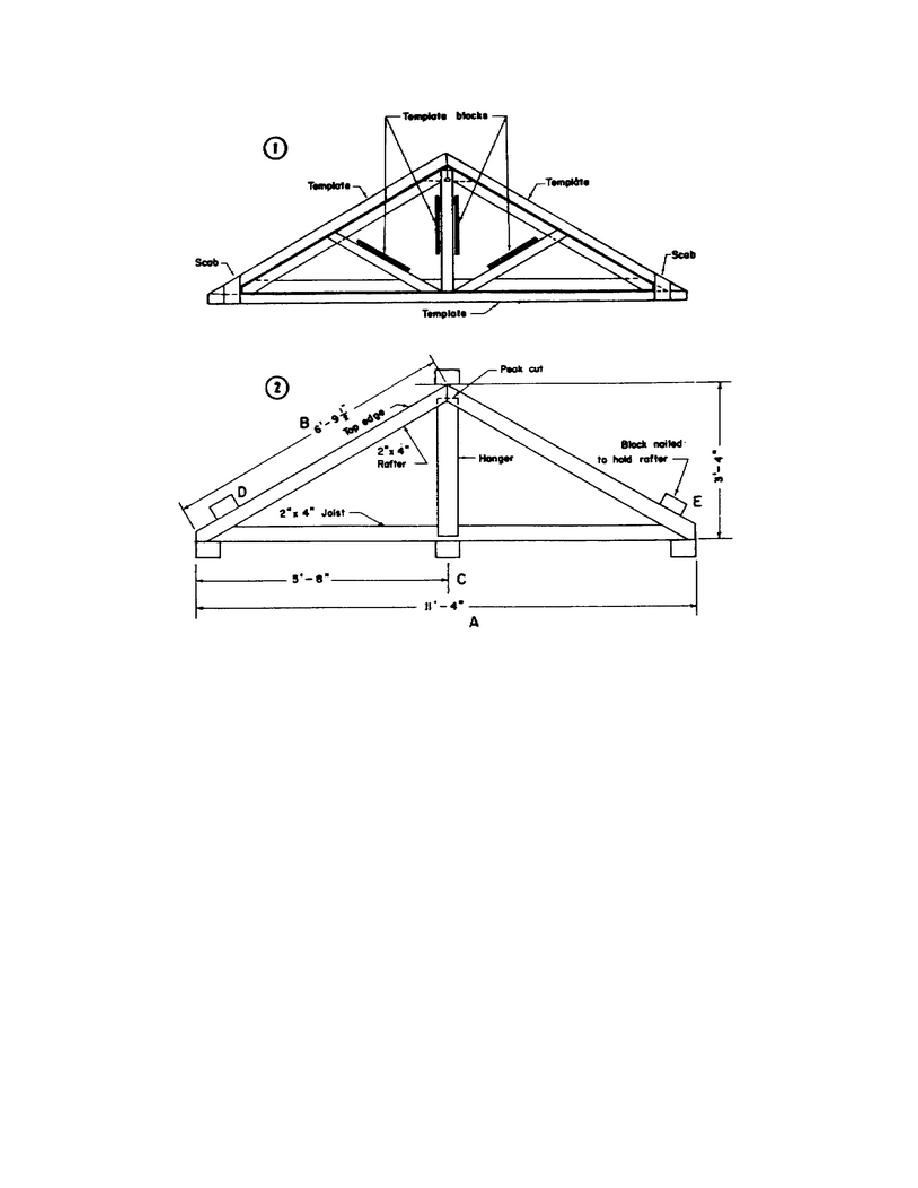
Figure 2-20. Rafter-truss jigs.
triangle, the base of which is half the length of the
spikes. Line up other end of chord. Nail as above.
base line, A, and the hypotenuse, B, which is the
Center bottom of hanger on top of chord and nail
length of the rafter measured as indicated. This is the
with 8-penny nails.
centerline, C.
e. Placement. After the rafters have been
(3) Nail 2 x 4 by 8-inch blocks flush
assembled into trusses, they must be placed on the
with the ends of base line A and centerline C as
building. The first set of rafters may be assembled in
shown. Mark centerline on center jig blocks.
the end section of the building or at the center as
indicated in figure 2-21. The rafter trusses are raised
(4) Start assembly by setting a rafter in
by hand into position and nailed to the plate with 16-
the jig with plate cut fitted over jig block at one end
or 20-penny nails. These trusses are temporarily
of base line. Peak is flush with centerline on peak jig
braced to the end section of the building, until the
block. Nail a holding block outside rafter at point D.
sheathing is applied. Building temporary platforms
Repeat for other rafter at E.
or work-benches for the workers to stand on while
erecting these trusses will save time. The knee
(5) Assemble trusses in the following
braces may be applied before or after the sheathing is
order: Lay one 2 x 4 joist or chord in place across
applied. Knee braces are not used on every rafter
base blocks. Lay two 2 x 4 rafters in place over joist.
truss unless severe wind conditions are anticipated.
Center one end of a 1 x 6 hanger under rafter peak.
In fact, as figure 2-19 shows, they may be spaced as
Center rafters against peak block. Nail through
widely as 16 feet OC. There are several methods for
rafters into hanger with six 8-penny nails. Line up
one end of chord. Nail through rafter with 16-penny
2-15


 Previous Page
