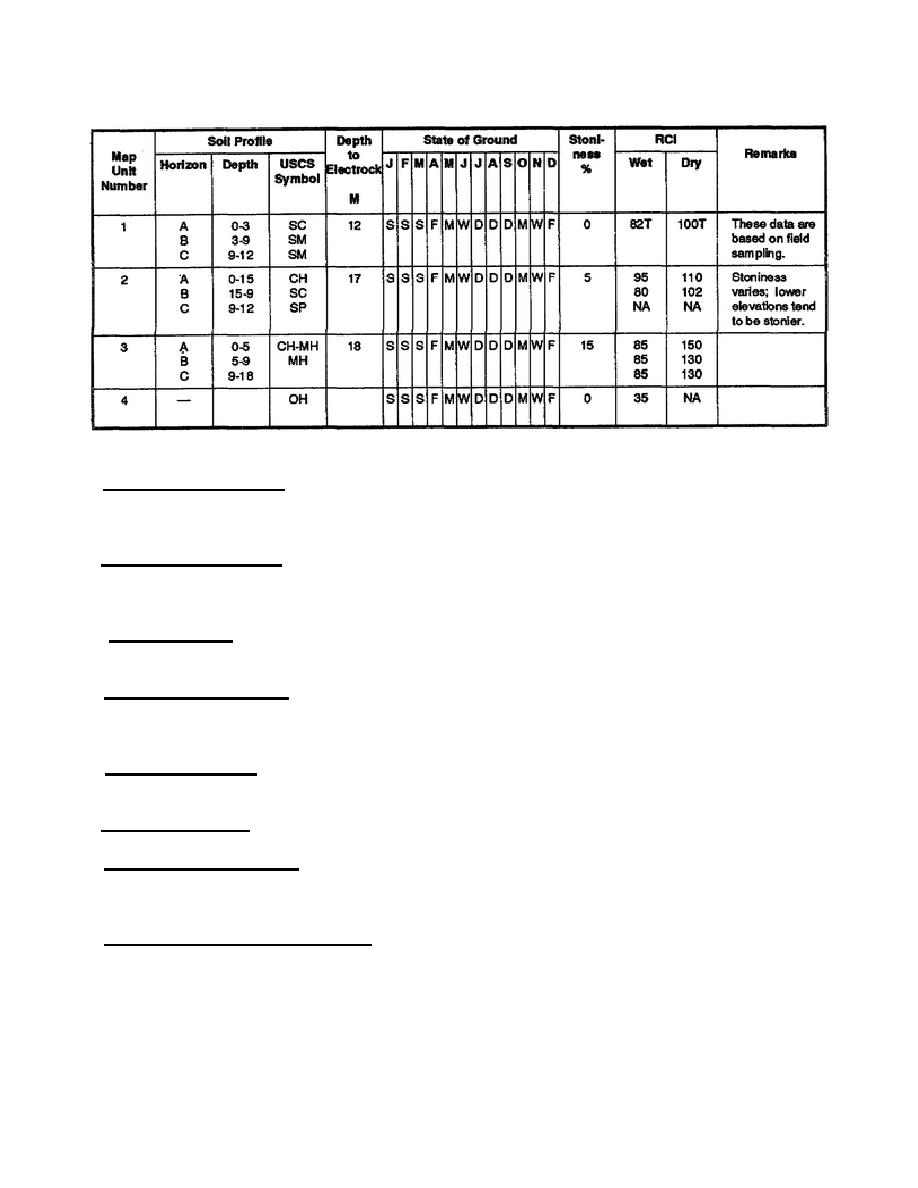
Table 3-2. Sample soils data table
1. Collection of Information. The first step in preparing a soil-factor overlay and its associated soil data table
involves the collection of available source materials, such as soil maps, landform distribution map, geologic maps,
topographic maps, aerial photographs, and field investigation reports.
2. Examination of Materials. The information that has been collected must then be examined to ensure that it is
up-to-date, accurate, and reliable. Any material that fails to meet these criteria should be ignored in further
analyses.
3. Analysis of Data.
The remaining data must be consolidated and analyzed so that soil types may be
determined.
4. Delineation of Boundaries. The boundaries of the various soil polygons should be delineated on a sheet of
mylar that has been placed over and registered to the 1:50,000 or larger scale topographic map(s) covering the
area of interest.
5. Labeling of Polygons. Each soil's polygon delineated within the area of interest should be labeled with a
unique number followed by its USCS abbreviation for soil type in parentheses.
6. Creation of a Legend. A legend must be created and included in the margin of the soil overlay.
7. Recording of Tabular Data. The number assigned to each of the soil polygons is recorded in the soil data
table along with corresponding information regarding the soil profile, the state of the ground, the stoniness of the
soil, and the soil's rating cone index (RCI), to be discussed later.
8. Storage and Retrieval of Information. The soil factor overlay and its associated soil data table are stored
together in a data base in such a way that they may be quickly and easily retrieved and used as needed.
EN5341
3-20


 Previous Page
