(4) Rotate the assembly into position using a pole or rope (see Figure 3-18, C, page 3-13).
(5) Line up and secure the rafter faces flush against the marks.
(6) Raise, align, and nail the three assemblies into position. Nail temporary 1 x 6 braces
across these three assemblies. Repeat this procedure with the other assemblies as they are brought into
position (see Figure 3-18, D). Check the rafter spacing at the peaks as the braces are nailed on.
(7) Braces may be used as a platform when raising those trusses for which there is not
enough room to permit rotation.
b. Web Members. The web members of a truss divide it into triangles. The members indicated
by heavy lines normally carry tensile stresses for vertical loads. Sometimes the top chords of these
trusses slope slightly in one or two directions for roof drainage, but this does not change the type of
truss. The necessary number of subdivisions, or panels, depends on the length of the span and the type
of construction.
c. Terms. These terms should be understood before proceeding further with this lesson.
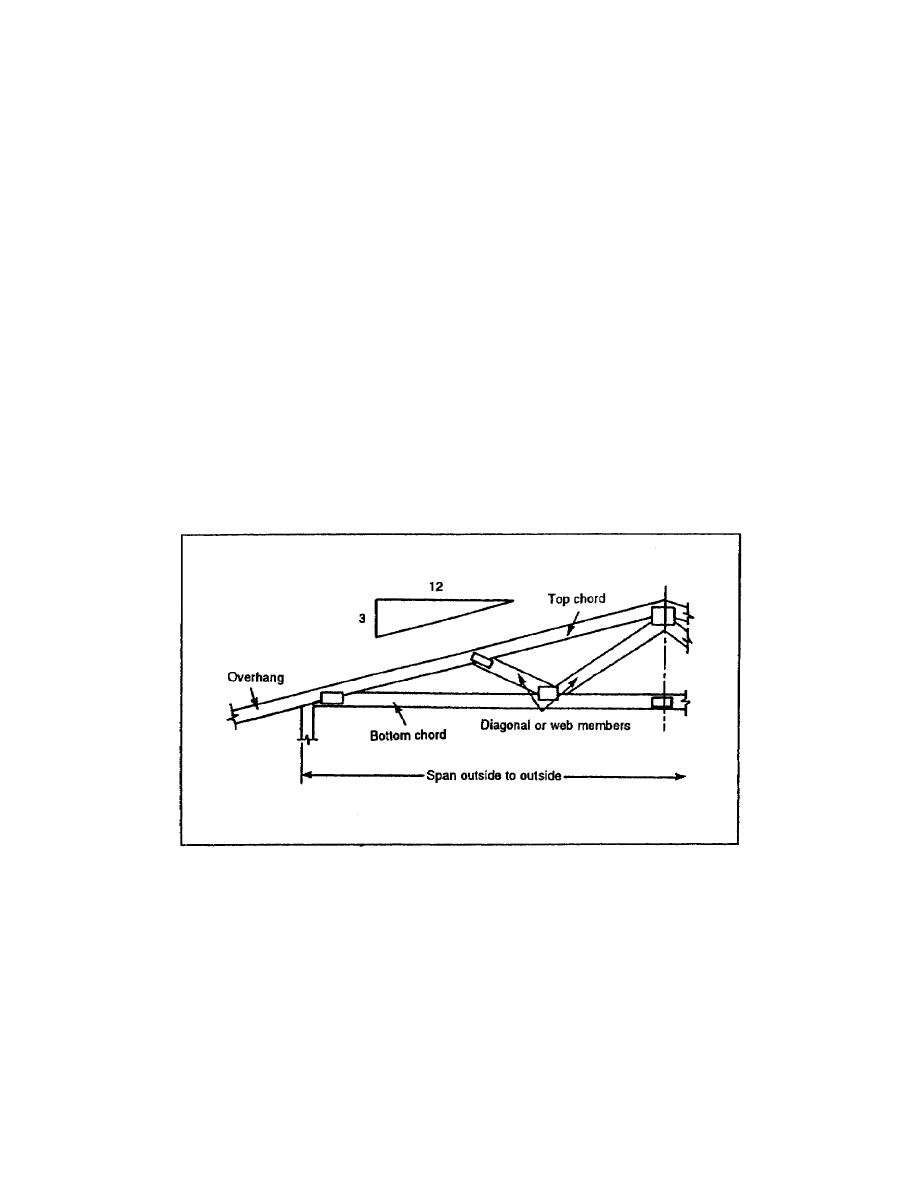
(1) Bottom chord. A member that forms the lower boundary of the truss (see Figure 3-19).
Figure 3-19. Truss
(2) Top chord. A member which forms the upper boundary of the truss.
EN5156
3-14


 Previous Page
