along all three axes. This is called an isometric
In oblique
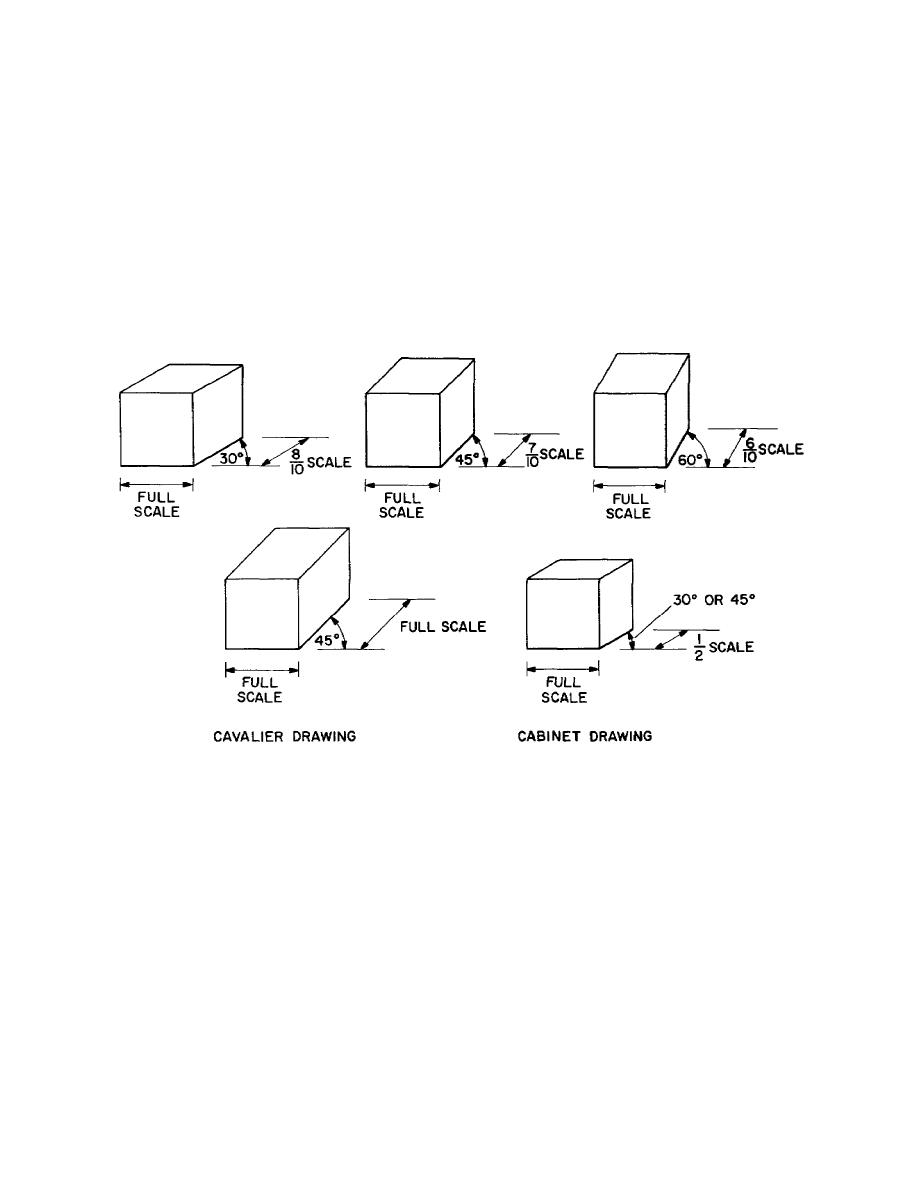
(2) Oblique drawings.
projection (fig 1-11), and is the most common type in
drawings (fig 1-12) the front face of the object is
technical work. All lines parallel with one of the
drawn in orthographic form, full scale. One or more
three principal axes are foreshortened by the same
sides are then added at an angle to the front face,
amount (to about 81 percent of true length) on an
either full scale, or foreshortened. Any angle and
isometric projection. In isometric drawing (fig 1-11)
scale may be used.
the common practice is to enlarge the scale factor so
that lines appear in true length. Remember, however,
(a) Cavalier drawing. An oblique
that this applies only to lines which are parallel to
drawing in which the receding or oblique lines are
one of the axes.
drawn full-scale at 45 degrees is called a cavalier
drawing (fig 1-12). The result does not create a
realistic appearance, but allows the use of one scale
for the entire drawing.
Figure 1-12. Oblique drawings of a cube
A cabinet
do when you look at an object. The perspective may
(b) Cabinet drawing.
drawing is an oblique drawing which uses half-scale
be two-point (two vanishing points) as illustrated in
measurements on the oblique sides (fig 1-12). These
figure 1-13 or one-point (one vanishing point) as
drawings are commonly drawn with the oblique lines
illustrated in figure 1-14. In a one-point perspective,
at 30 degrees or 45 degrees to the front plane. The
the front face appears as if you were looking at it
name comes from the fact that it is often used for
head-on. The viewing angle may be changed by the
drawings of cabinet work.
selection of different positions relative to the horizon
(fig 1-14). Perspective drawings are more difficult to
The most
draw than projections or oblique drawings, because
(3) Perspective drawings.
realistic pictorial is the perspective drawing. In this
the scale changes continuously along the receding
type of drawing, the receding lines converge at a
lines; for this reason, they are not practical for
vanishing point on a horizon, just as they appear to
construction drawings.
13


 Previous Page
