Lesson 1/Learning Event 2
c. The thimble is graduated in 50 divisions with every fifth line being
numbered.
d. Rotating the thimble from one graduation to the next moves the
spindle 1/50 of 0.5 mm, or 1/100 mm. Two graduations equals 2/100
mm and so forth.
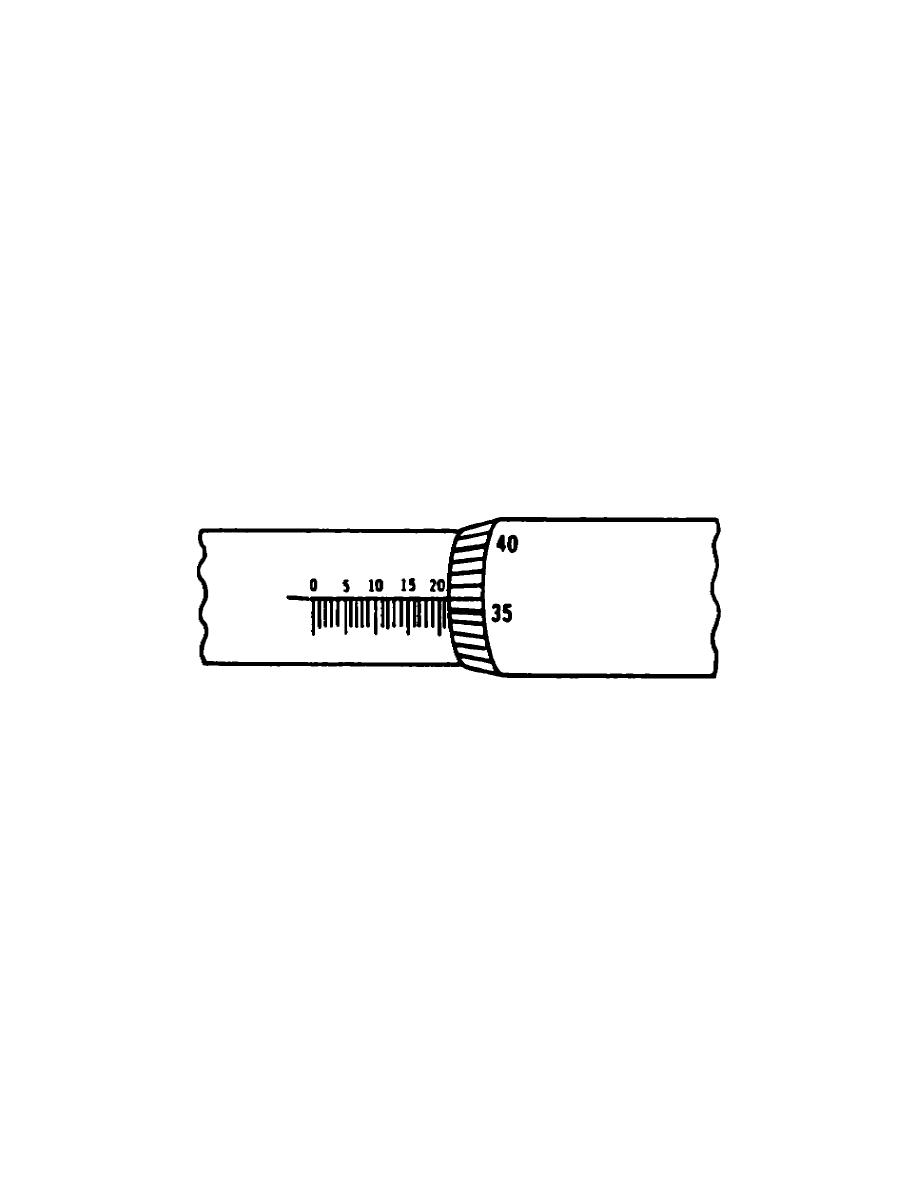
Refer to Figure 8, and follow the same sequence as was used for the standard
micrometer and determine the measurement indicated.
a. Highest figure visible on barrel.
20 = 20 mm
b. Number of lines visible between
No. 20 and thimble edge.
2 = 2 mm
c. Line on thimble that coincides
with or has passed the revolution
or long line on the barrel.
36 = .36 mm
d. Measurement reading.
Total = 22.36 mm
FIGURE 8.
METRIC MICROMETER SCALE
READING VERNIER MICROMETERS
Reading vernier micrometers is the same as reading standard micrometers. An
additional step must be taken to add the vernier reading to the dimensions.
This allows precise measurements accurate to ten thousandths (0.0001) of an
inch.
This scale furnishes the fine readings between the lines on the
thimble rather than making an estimate as you would on a standard
micrometer.
The 10 spaces on the vernier scale, Figure 9, (1) are equivalent to 9 spaces
on the thimble (2). Therefore, each unit on the vernier scale is equal to
0.0009 inch and the difference between the sizes of the units on each scale
is 0.0001 inch.
12


 Previous Page
