Lesson 2/Learning Event 2
Reading a Metric Vernier Caliper
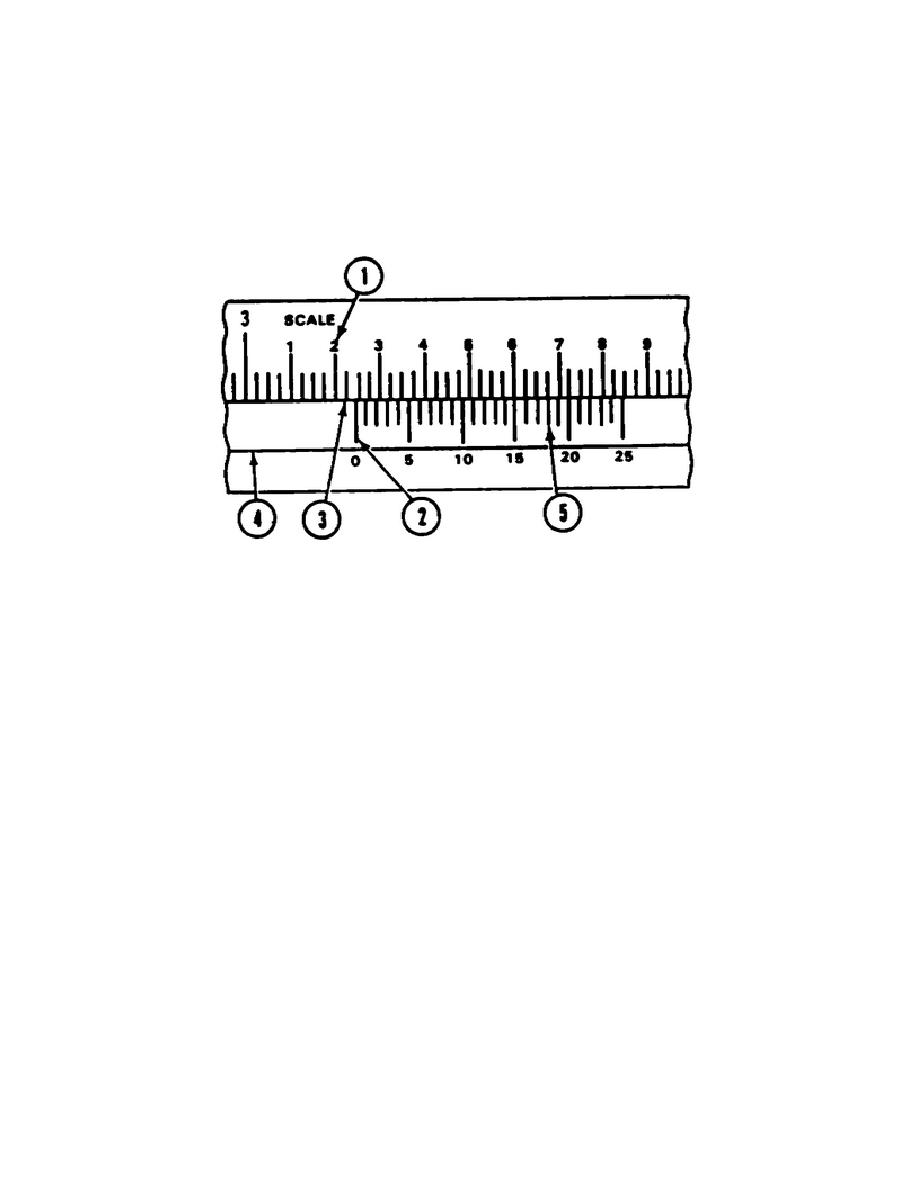
Refer to Figure 35, the steel rule (1) is divided into centimeters (cm) (2).
The longest lines each represent 10 millimeters. Each millimeter is divided
into quarters.
The vernier scale (3) is divided into 25 parts and is
numbered 0, 5, 10, 15, 20, and 25.
FIGURE 35.
METRIC VERNIER CALIPER SCALE
Again refer to Figure 35.
The metric vernier caliper would be read as
follows:
a. The total number of millimeters
(1) to the left of the vernier
zero index (2) and record.
32.00 cm
b. The number of quarters
(3) between the millimeter
mark and the zero index and
record.
.25 mm
c. The highest line on
the vernier scale (4) which
lines up with the line on
the scale (5) and record.
.18 mm
d. Add the three readings.
Total 32.43
44


 Previous Page
